"Choux pastry? Pierre Herme?" my friend Jill commented. "How very daring."
And oh how right she was. I had told Jill of my upcoming eclair making, and she knows her way around her double boilers and cheese cloths enough to know that this would present a challenge. A Daring Baker challenge, in fact.
Making choux pastry is one of those fearful cooking acts, like rising a souffle or setting a custard, that can scare cooks to their jellied marrow. For me, though, the first challenge the pastry presented was in mixing it with my grandmother-inherited hand mixer. As it thickened up after each egg, I too slowly thought "I wonder if this will be too much for the old dear Kenwood". Up twirled the dense mixture as I tried valiantly (vainly) to switch the speed to high, and out poured the smoke and the bad, bad smell of a electric kitchen appliance dying. At least it went doing what it loved best (a moment's pause everyone, moment's pause). 
The eclairs looked wonderful when I pulled them out of the oven...and then slightly less wonderful a minute or so later. Most, sadly, needed a wee bit longer in the oven and deflated into pathetic flattened fingers. Shoe pastry rather than choux pastry, though it did give me the excuse to 'test' a few in their natural state. Without the chocolate sauce or custard to round them out, I found them very, very eggy - able to stand having one or even 2 eggs left out of the recipe, I thought.
We were given the option to alter one of the two chocolate elements in the recipe, and so rather than having chocolate filling I thought I'd make good use of our bumper crop of raspberries (the rainy and grey British summer does have some uses) and turn out a raspberry pastry cream instead. I simply swapped out the melted chocolate for a small bowl full of raspberries, boiled with some water and sugar until they were just sweet and syrupy enough, and added this into the pastry cream mixture to turn it a lovely pink and leave Mr A&N in a state of pastry cream ecstasy.
Overall, the recipe was as simple as it could be given the art we were producing, and certainly less of an all-day marathon than other recent challenges, which was appreciated. The end result was wonderful, even if it did leave huge amounts of chocolate sauce in the fridge, which I'm still bravely eating on top of anything that might cope with it (gnocchi with chocolate sauce has been over-ruled this lunch time, though bananas with chocolate sauce stays on the menu). Thanks to Meeta and Tony for setting the challenge and letting us indulge our inner French pastry chefs. Pierre Herme, you shall be getting the bill for my new hand mixer.
Thursday, 28 August 2008
Daring Bakers: Chocolate Eclairs

Sunday, 30 March 2008
The Daring Bakers: Perfect Party Cake
The primary rule that all Daring Bakers need to keep in mind is that they may not deviate from the month's chosen recipe. Except, of course, when they're told to do so. Morven of Food, Art, and Random Things gave the gift of creativity when she chose Dorie Greenspan's Perfect Party Cake as this month's task. Other than following the basic cake recipe and turning the confection into a layer cake, we were given free reign over how we decorate and flavored our creations.
The main thing that restrains my creativity is my own mind, which is a shame. When trying a new recipe, I like to follow it closely to the suggested recipe so I can form my opinions of it before thinking of ways of improving it, so I knew I'd be sticking to the bulk of what Dorie had written. I did latch on to the idea of cherry jam in my layers and cherries on top, mainly because a cherry on top connotes to me the idea of a special treat, and this being your perfect party cake is a pretty special occasion. I found naturally colored cherries from a UK website selling bulk baking goods, which made a nice and comforting change from the uber-red cherries with they're goodness-knows-what-chemicals-in-them that I grew up eating (they also sold green cherries - green cherries? Green??! I'll stick with natural, thanks very much).
Knowing that it wouldn't be a challenge for this house of two people to eat a whole iced cake, simply a Very Bad Idea, I took all my ingredients, measuring bits, tins and hand mixers away with me over the Easter weekend which was spent with Mr A&N's extended family. The only challenge, then, would be in ensuring that the cake had enough slices for the 15 people who would be there, as well as making sure that I didn't produce such a poor product that I didn't just leave my mother-in-law doubting my cooking skills, but left my husband's Aunts, Uncles, siblings, cousins, assorted spouses and friends shaking their heads in sadness at my lack of skills. Just the relaxing baking atmosphere in which I like to cocoon myself.
I found the cake and icing quite straight-forward to make, with my ancient hand blender (inherited from Mr A&N's grandmother) heating up worryingly as it clocked up the 10 minutes the icing demanded of it. The baking cake smelled wonderful, although working with an untested oven meant that I had to reduce the heat halfway through the cooking since the cake was getting a bit too brown too quickly. The cake fell a bit and pulled in from the sides of the tin as a result which made it look small and unlikely to feed 15, but once it was sliced into its layers its height promised better things.
The cake was a talking point as everyone eyed it up through the afternoon, and everyone dipped in for a slice (with 16 cherries dotted around the edges, serving sizes were partitioned nicely). The general reaction was that this was indeed a fine party cake and reminded most people of childhood birthdays. Most were fans of the icing, but would have liked the cake to have been a bit lighter and springier - the overall effect was more dense than expected. There was one lone slice left which no one felt right claiming, so I was able to get up early and take a photo of the mangled layers before diving in for what was my Easter breakfast, saving that cherry on top for my last bite.
For the recipe, please either have a look on Morven's blog or worship at the altar of Dorie's Baking From My Home to Yours.
Monday, 10 March 2008
Chocolate Cocount Tarts
I have been out of commission the last several days with what would politely be called a stomach bug but was most probably some form of particularly nasty food poisoning. I have very bad luck with getting sick - I'd point out at this stage that it has never before been from my own doing - and am usually the one in the group who gets served the bad oyster or the contaminated sandwich. This latest round might or might not have been my doing, having tasted some uncooked batter in which I'd used eggs from chickens that hadn't been salmonella-protected. After that lick I realized it was risky, now I think it was plain stupid.
So woe is me, but now that I can look at food again, let's get back to the cooking (presuming you all still trust me around food).
The chocolate coconut tarts Marita Says chose for the last round of Hay Hay It's Donna Day made me sit up and say yes please. These seemed like a mature sort of coconut macaroon with the clever twist of turning the macaroon into the shell of the tart. I can never turn down, and often deliberately turn to, coconut macaroons, probably since it's one of the few things I remember my grandmother making for me. My mother spoke of her mother's macaroons in awe, telling me how my grandmother had learned the recipe in cooking school and that my mother was too intimidated to attempt them herself. It wasn't until I was older and thought of rectifying years of home-made macaroon deprivation that I realized how easy macaroons were to make and wondered why I had done without them for so long.
I made these as the dessert to please the kiddies when we played host to some toddlers a couple weeks back. The children absolutely loved them and did their best to consume the generous 5 mini-tarts I had placed on each of their plates (ignorant non-parent thinks: They'll never finish them all but let's give them some fun; in-the-know parents in the room think: Good god, this woman isn't fit to feed children).
It was, of course, wonderful to have the children be such eager consumers, particularly because these tarts were little buggers to make. The tip to wet your fingers with water in-between pressing the coconut into the muffin tins was essential: the egg-white coated coconut bits were indescribably sticky and the two dozen tarts took me the best part of an hour to make and did not leave me in a pleasant mood at the end. The threat of bad language continued once the baking of the tarts was done and I was supposed to remove the casing from them. All the extra moisture from pressing the coconut into the muffin paper sealed the paper layer and edible layer together in a horrible, anger-inducing immutable bond. After letting them set in the freezer and then relax in the fridge for several hours, the paper gave up its death grip on the tart and I was able to peel most of the casings away and feed it to small children without them accusing me of trying to poison them.
Once the agony was put aside, the tarts were excellent and an excellent new way to enjoy the simple pleasures of coconut and chocolate together - even if I did miss the submission date for the Donna Day event. For all the effort they took, though, I would be more tempted to enjoy some chocolate-dipped macaroons next time, and in fact plan on making some of those later this week.
Donna Hay Coconut Chocolate Tarts
For the shell:
- 2 egg whites
- 1/2 cup white sugar
- 2 cups dessicated coconut
For the filling:
- 1 and 1/4 cups cream (or soya cream)
- 300g dark chocolate, chopped
- (optional: 1 Tbs seedless raspberry jam)
- Preheat your oven to 180C /350F.
- Mix the egg whites, coconut and sugar well.
- Scoop the mixture into muffin tins and with wetted hands (works best this way) press it out to create a base and sides for a cup.
- Put into the oven at bake for about 8-10 minutes, or until it begins to lightly brown. Remove from the oven and let cool for one minute.
- Gently remove the cups from muffin tins and let it cool more.
- While this is happening, heat the cream in a saucepan until almost boiling.
- Remove from heat and throw in the chopped chocolate. Stir until the chocolate has melted into the cream and you have a decadent and rich looking chocolate liquid. If using jam, stir in at this point.
- Carefully, fill each cup with the liquid.
- Put the cups on a plate or tray in the freezer and leave it for 10 minutes or until set.
- When set, remove from the freezer.
- (If, as I did, you use paper muffin cups rather than tins and have trouble removing the paper from the shells, allow to sit in the freezer for longer and try to remove it after that)
Wednesday, 27 February 2008
Stem Ginger Cookies
We spent this Saturday doing one of the most indulgent and relaxing things we all-too-infrequently do: we spent the day (and night) playing board games with friends. It feels like a very simple - even childish - pleasure, but I get Christmas-like excited whenever these days crop up. There's one game in particular our group has become besotted with, and we managed to squeeze in two rounds of play. A wee bit competitive in nature, I won the first game and graciously declared myself the best player in the room for then and evermore. For the second round of the game, I was within grasping distance of victory when I allowed myself to become weak, and watched as Mr A&N stole victory from me. I congratulated him by throwing my cards down and reminding him the whole way home that, really, I was the real winner, he just happened to finish first.
Since my competitive side can't be soothed with sleep, I woke up early on the Sunday again turning over his victory/my loss in my head. Finding yourself awake at 7am on a Sunday morning is a pretty poor showing for your two-day weekend, so I put my over-active mind (But WHY didn't I just stop him??!) to better use by thinking of something to bake that day.
Oatmeal. That was my first non-board game thought. Oatmeal cookies comfort me, with their moist and slightly chewiness and the outside chance of health benefits (if you can ignore the two sticks of butter). Oatmeal raisin cookies should have their own place in heaven, but I did want to try something different. My mind rummaged through the cupboards and found an un-opened bag of crystallized stem ginger. Stem ginger is almost peppery in its sharpness, which on its own can be a bit firey and should only be eaten by those prepared for the experience. The sharpness is a good combination with the buttery and slightly nutty dough of an oatmeal cookie.
For those without a mixer (like me) the dough does get very stiff once the oatmeal and flour are stirred in, so do either make sure you have the balance of spices right before adding in all the flour, or ask a big, strong man with a rather large mixing spoon to help you stir. Enjoy with a large glass of milk and leave any obsessive thoughts behind you.
Stem Ginger Cookies
Makes around 3 dozen cookies
- 1 C / 225 g unsalted butter
- 1 1/2 C firmly packed light brown sugar
- 2 large eggs
- 1 tsp vanilla extract
- 1 1/4 C oats
- 2 1/4 C all-purpose flour
- 1/4 tsp baking soda
- 1/2 tsp salt
- 2 tsp all-spice
- 4 tsp ground ginger
- 1 C / 100 g stem ginger, roughly chopped
- Cream together the butter and sugar until smooth
- Add the eggs and the vanilla and stir well
- Sift together the flour, salt, soda and spices
- Stir the oats into the butter and sugar mixture
- Add the flour mixture in batches into the oats and butter, stirring thoroughly throughout
- Stir in the chopped stem ginger
- Heat the oven to 325 F / 170 C
- Chill the mixture for 30 minutes
- Drop by teaspoonful onto a cookie tray and cook for around 15 minutes until brown
- Let cool for the first minute on the tray, and then move to a rack to cool completely
Friday, 15 February 2008
(Betty's) Carrot Cake
This post was meant to be a tribute to my friend Betty and her wonderful carrot cake. She's a Canadian transplant to the UK and like all good North Americans she understands the importance of baking a good cake. Betty took the time to write out her time-honored recipe for carrot cake after Mr A&N came away from his first slice declaring he had been to the promised land and it had had a cream cheese frosting.
With my two bags of carrots bought and aching to be shredded, though, I found that Betty's recipe had disappeared. This lone piece of paper had been tucked into my own trusty book of recipes but I can only presume it feel out during the kitchen building chaos. There was no Betty available to give me the recipe again, and with friends coming around in a few hours I felt I had to stick to the plan.
I instead turned to the internet and found something on All Recipes that seemed to fit the bill, and was highly rated by other users. Losing my intended recipe set the tone for the experience - I suffered from exploding butter left in the microwave too long, me having eaten one of the 4 eggs needed for breakfast, and accidentally popping the cake out of the spring-bottom dish so that it flipped onto the counter top. I had to substitute hazelnuts for walnuts which turned out to be a good swap, but it seemed as if each step of the recipe was a reminder of how this wasn't meant to be.
I wasn't over-awed by the results. The cake itself was moist and warmingly spicy but a bit too sweet, and the cream cheese frosting didn't have as much of a tang as I would have liked it to. I cut back on the sugar in the frosting since I already knew the cake was sweet, but it still wasn't cream cheese-y enough and slightly too runny. People did ask for seconds so the recipe certainly wasn't a failure, but Betty will be getting a phone call from me soon, as our much-overdue catch up has suddenly become more urgent.
Carrot Cake (from Tammy Elliott on All Recipes website, printed with the changes I made)
makes one 9 x 13 inch tray or two 8 inch circular tins
- 4 eggs
- 1 1/4 cups vegetable oil
- 2 cups white sugar (some comments on the recipe suggest using half brown and half white sugar)
- 2 teaspoons vanilla extract
- 2 cups all-purpose flour
- 2 teaspoons baking soda
- 2 teaspoons baking powder
- 1/2 teaspoon salt
- 3 teaspoons ground cinnamon
- 1 tsp allspice or nutmeg
- 3 cups grated carrots
- 1 cup chopped hazelnuts
- 1/2 cup butter, softened
- 8 ounces cream cheese, softened
- 3 1/4 cups confectioners' sugar
- 1 teaspoon vanilla extract
- about 1 C of hazelnuts, chopped
- Preheat oven to 350 degrees F (175 degrees C).
- Grease and flour your cake pan(s).
- In a large bowl, beat together eggs, oil, sugar and vanilla.
- Mix in flour, baking soda, baking powder, salt and cinnamon.
- Stir in carrots, and then fold in the nuts.
- Pour into prepared pan.
- Bake in the preheated oven for 40 to 50 minutes, or until a toothpick inserted into the center of the cake comes out clean.
- Let cool in pan for 10 minutes, then turn out onto a wire rack and cool completely.
- To Make Frosting: In a medium bowl, combine butter, cream cheese, confectioners' sugar and 1 teaspoon vanilla. Beat until the mixture is smooth and creamy. Stir in chopped pecans. Frost the cooled cake.
Monday, 3 December 2007
Apple and Pumpkin Pies
In my family, Thanksgiving and Christmas are a very similar affair, culinarily speaking. That's not a complaint, please note. The recurring themes are turkey (mainly because I demand it - I can't get enough of the meat, and have eaten myself into a turkey coma on more than one occasion), stuffing, some form of potatoes, and pie. Pie is almost always pumpkin, made by the dear Mrs. Smith. As much as I insist on turkey showing up twice a year, my father insists on frozen pumpkin pie. My brother and I have dared to try to make it from fresh and serve it instead, only to be threatened with removal from the will for the betrayal of switching pies on my father (well, not really, but he was rather upset and forbade us from denying him the frozen variety again).
In the UK, pumpkin pies are slightly harder to find, either the fresh bakery or frozen variety. That doesn't cause too much strain since I prefer to make my own, and once I'm armed with my trusty tins of pumpkin (thank you Waitrose), the hardest part of making the pie is deciding how indebted I want the flavor to be to Mrs. Smith's. Which, as it turns out, is my absolute standard for how pumpkin pies should taste. I suppose I've been indoctrinated as much as my father has, I'm just more stubborn and will make it from scratch in order to make it taste like the frozen. Still, that's some damn fine pumpkin pie.
Apple pies are a close second on the holiday pie-eating favorites list. It was for the sake of apple pies that I made my first pastry, and honed my technique (as it is). I've been making apple pies and crumbles for years now, though I still tweak my apple recipe each time I make it. I currently like to sautee up my apples for a couple of minutes, accompanied with a glug of amaretto liquer and the occasional handful of raisins if I'm feeling in a German, strudel-like mood.
I had a request to make an apple pie this week for Anne, the grandmother of my just-baptized godson Matthew. The pie was to be the dessert at the christening party, although I wasn't under any delusion that the pie was meant for anyone other than Anne. Sadly, I was hit by a bug this weekend and Mr. A&N rightly declared that I couldn't/shouldn't/wouldn't be handling foodstuffs unless I was happy with possibly infecting the whole party. So Anne didn't get her apple pie, for which I can say: stupid sickness bug. I have promised to make it for her the next time she's over from Ireland, but shall in the mean time post the recipe here (along with a picture of baby Matthew, the most gorgeousest baby I've had the privilege of blowing raspberries onto).
Pastry Crust
Makes enough for 1 10" crust; double if making apple pie or any other covered pie
- 1 C flour
- 1/2 tsp salt
- 70 g / 1/3 C shortening (Crisco in the US, Cookeen in the UK)
- 1 1/3 Tbs butter
- (optional: ground cinnamon or nutmeg)
- apprx 1/8 C ice cold water
- Cut the flour, salt, shortening and butter in together until the mixture resembles coarse corn meal. I like to add in 1/2 tsp of cinnamon or a few shavings of fresh nutmeg in with the flour mixture in order to give the pastry a bit of the taste of the pie.
- Add water into the pastry a bit at a time. You should use enough water to gather up all the dry bits of the flour mixture, but the pastry should not be wet or tacky.
- Cover and allow to sit in the fridge for at least 1/2 hour.
- After chilled, roll out the pastry on a floured surface so that it's big enough to fit in the base of the pie dish.
- Cut off any excess dough (if making the pumpkin pie, you can cut back to the top of the rim of the dish; for the apple pie, leave a little bit more overhang).
- Line the dish with baking paper and fill with weighted baking beans (or, the cheap option of dried beans) and blind bake for 10 minutes at 175 degrees C.
Pumpkin Pie (bake at 220 C, reducing to 175 C)
- 1 1/2 C mashed pumpkin (about 4-6lb fresh pumpkin roasted, peeled, and drained or 1 15 oz tin)
- 1 14 oz/400g tin sweetened condensed milk
- 2 eggs, yolks and white separated
- 2 tsp ground cinnamon
- 1 Tbs allspice
- 1 tsp fresh ground ginger
- 3/4 of 1 fresh nutmeg, ground
- 1 tsp salt
- Combine the pumpkin, condensed milk, egg yolks, all the spices and salt, and mix well.
- Beat the egg whites until fluffy and with soft peaks
- Fold in the egg whites into the pumpkin mixture (if you have trouble with folding - like I do - stir in about 1/4 of the egg whites until well combined, and then fold in the rest of the whites. It will be much easier).
- Pour mixture into blind-baked crust, and bake for 15 minutes at 220 C. Then reduce the temperature to 175 and bake for another 40 minutes.
Apple Pie
- 8 average sized apples (cooking apples are recommended though since these can be quite big, 4-5 will probably do)
- 1/4 C flour
- 1/2 C light brown sugar
- 1 tsp cinnamon
- 1 Tbs butter
- 1/3 C almond-flavored liquor
- Peel and slice the apples into thick chunks (about 1/2 inch in width).
- Place sliced apples in a bowl, into which you'll add the flour, brown sugar, and cinnamon. Sire well and allow to sit for 1/2 hour.
- Heat the butter in a frying pan, and add in the apple slices and any of the juices from the bowl.
- Add the liquor, and sautee for 3-5 minutes until the liquid has thickened a bit. The apples shouldn't begin to soften, the ingredients should simply come together and create something of a syrup.
- Place into the pie tin with the blind-baked crust. Cover with another layer of rolled-out pastry, and cinch the top and bottom crusts together by folding the top edge under the bottom and creating the fluted-type pattern with your fingers as seen above.
- Cut a hole into the top crust, making it seasonally decorative (such as a leaf or a turkey).
- Brush the crust with milk or a beaten egg.
- Bake for around 45 minutes at 175 C, taking care not to let the edges of the crust burn (if the edges do start browning too quickly, cover them in foil).
Sunday, 25 November 2007
Daring Bakers: Potato Bread
The gauntlet was thrown down this month for the Daring Bakers: we were to make a bread recipe, but we were all banned from using a bread machine. Well, thought I, this would be more of a hardship for some than others. I own no bread machine, so I couldn't mourn what I didn't have. Any bread I make has to be done the hard way, and though I'm not a bread expert the prospect didn't leave me shivering in yeast-based fear.
The bread was a potato bread, chosen by Tanna at My Kitchen in Half Cups (where you can find the recipe). The bread could be formed into humble loaves, shaped into dainty rolls, or laid out as a lovely focaccia. It didn't take long for me to decide on the focaccia; I had never made one before, and I love drizzling that bread with olive oil and different Italian toppings.
The recipe was mildly confusing in that we could use two different quantities of potatoes, depending on our confidence levels. Or, in my case, general foolishness: I has happy to wade in to the deep end despite not being familiar with the recipe. I was also, as is becoming typical for me, facing a few obstacles: we are at the tail end of house construction (namely, creating a new kitchen) so each day that goes by sees more dust and less counter-top space in my already small kitchen; our weekends are taken up by renovation work so finding a window for baking is getting more difficult; taking pictures is nearly impossible since there are no un-cluttered surfaces and the only natural light I can grab demands me waking up early and sneaking into the extension before the builders arrive; and on the only day I could take on the recipe I had a friend's (important) concert to attend in the evening, so I had to finish everything by a given time. Better get cracking. I started the potatoes boiling around noon, giving me plenty of time to be dressed and out of the house by 6pm. And then friends dropped in for a visit. Despite the place being chaotic and there not being a dusty-free chair to offer them to sit on, they stayed and chatted and I even mustered up a cup of coffee. What was that you said? Oh yes, the potatoes - thanks for reminding me. They boiled for the allotted time but then sat in the water for quite some time more, slowly getting a bit mushier and taking on quite some water.
But these were my only potatoes and my windows were closing fast, so these would have to make do. The mixture was very, very wet even after using all 8 cups of flour. Since I had whittled down my time by chatting with my friends, I calculated that I could only let the dough rise for 1 hour rather than the suggested 2 hours. This rushing was in some ways fortuitous, since even after one hour the dough had risen a good deal - or, more accurately, the very wet dough had made an attempt to rise and was drooling itself over the sides of the bowl. Kneading the bread was a problem because it was so wet. On the counter-top, it looked more like The Blob than a bread, spilling its way around and trying to absorb the utensils and microwave on the edge of the counter. I added more flour - another 3 cups or so - in order to make it marginally less tacky. This meant that I had a huge amount of dough on hand, so I divided it in two at this point and froze half.
The focaccia would take about 30 minutes to bake, and I had 35 minutes before I had to leave the house (honestly, where had the time gone?!). The bread went in the oven, I got changed (the kitchen and I were covered in flour, but luckily the kitchen didn't have to head out to the concert), I readied all my things and was set to sprint out the door after making sure the oven was off. After the 30 minutes, the bread looked like it could use a bit more time to come to a golden color, but time was the one thing I didn't have. The bread would have to settle for sitting in a still-hot-but-turned-off oven to finish cooking. The bread was very good despite the compromises I forced upon it. I will make it again, and next time make sure that I take the potatoes out of the water promptly and give the dough the full time to rise. I would also resist adding any extra flour, since my bread was slightly on the dense side, and I felt it could be lighter. And me? I made the concert on time, though I did have to sit there, quietly picking off the dried dough from my wrists and arms which hadn't quite washed off. It's no wonder my friends want a classy person like me to give them moral support.
Tuesday, 13 November 2007
Pumpkin Bread
I was recently asked a question by a fellow American-in-London which resonated deeply with me: did I know a good recipe for pumpkin bread, because the last several she tried out all smelled and tasted like very bad things. Sweet pumpkin things are much more an American affair than a British, and even just finding tins of pumpkin in the UK can be very difficult (or, when you find them, they're two to three times as expensive as you'd expect back home). Messing about with substandard recipes is a hazard on both the wallet and the stomach. No pressure on me to come up with the goods, then.
Pumpkin pie I'm very familiar with making, but I've only made pumpkin bread once in my memory. I was 14 and was in a flush of post-Thanksgiving turkey eating, and wanted to carry on the Thanksgiving spirit through seasonal baked products. At 14 I was comfortable with baking, but my mother's cooking repertoire had changed in the preceding years to shun any use of an oven or stove top in lieu of the microwave. Although I grew up with her baking for us (granted, from packets), once she returned to work it was microwaves a go-go. I would occasionally be allowed to make a banana bread when we had bananas half a step away from being thrown in the bin, but otherwise the oven was cast suspicious glances and only used at holiday times and discouraged at all others.
Just before my foray into making pumpkin bread, my family got a counter-top convection microwave oven - essentially a microwave with a bit more excitement thrown in. The convection microwave came with a recipe book, and within that book was - behold! - a recipe for pumpkin bread. This was akin to divine intervention for my mother: she hadn't wanted me to use the normal oven to bake, so this opportunity to make a convection microwaved-approved baked good meant that my fate was sown. I was young enough then to still listen to my mother, but I now would know better. My overriding memory of that pumpkin bread was that it was rubbery, slightly flat and sunken, fairly tasteless, and shockingly orange.
This would not be the recipe I would suggest to an American looking for a good pumpkin bread, then. So while I didn't have a known pumpkin bread on hand, I did have a favorite recipe for zucchini bread which I figured I could tweak a bit. Zucchini was swapped for pumpkin, cinnamon found itself accompanied by nutmeg and allspice, and I made a simple crumb topping which made me question whether or not it would be gastronomically acceptable to just eat a tray-full of crumb topping.
I made both a loaf as well as half a dozen extra-large muffins, all of which looked and came out beautifully. The bread stayed moist and all the spices come together in a lovely warming medley. The pumpkin, as it often is, was so subtle it threatened to disappear if you didn't concentrate on it; I would try making the recipe with more pumpkin next time to see how that worked out, although I've written the recipe out as I made it. But I will most certainly be making this again, and forwarding it on to any Americans-in-London yearning for pumpkin bread as well.
Pumpkin Bread
Makes 1 large loaf or 18-36 cupcakes, depending on size
- 3 C all-purpose flour
- 1 tsp salt
- 1 tsp baking soda
- 1 tsp baking powder
- 1 1/2 Tbs cinnamon
- 3/4 Tbs allspice
- 3/4 freshly grated nutmeg
- 3 eggs
- 1 C vegetable oil
- 2 1/4 C caster sugar
- 3 tsp vanilla
- 1 15 oz tin of pumpkin (or 15 oz of fresh pumpkin, after roasting and draining it of excess water)
- 1/2 C walnuts, chopped
- For the topping: (I admit, this is approximate - you may need to even out my measurements, but the consistency when made should by like big grains of sand)
- 10 g butter
- 20 g flour
- 15 g brown sugar
- Pre-heat the oven to 165 C / 325 F
- Sift together all the dry ingredients - the flour, salt, soda, baking powder, and spices
- Beat together the eggs, oil, vanilla and sugar until they're well mixed
- Sift dry ingredients into the wet ingredients in batches, mixing thoroughly each time
- Stir in the pumpkin and mix thorougly
- Stir through the walnuts
- To make the topping: combine the butter, flour, and brown sugar in a bowl, and using two forks turned upside-down from normal, cut the three ingredients together until they resemble rough grains of sand
- Pour either into a large, greased bread tin, or into cupcake tins
- Sprinkle the topping onto the bread/the cupcakes
- Bake the bread loaf for 60-70 minutes, the cupcakes for apprx 25 minutes for normal sized cupcakes, 35 minutes for large cupcakes
Thursday, 8 November 2007
Lime Pie and a Non-Brush With Stardom
I recently had an email from a production company, telling me about a new cooking show they were filming. They were interested in having me on the show, they said; I would prepare a dish ahead of time, bring it with me, and when on the show could have a chance to talk about what I made (and a bit about myself as well) and might help the head chefs out in the kitchen.
Now I was in two minds - clearly I enjoy making my food and sharing it with people and this would be a huge venue for this, but my overriding thought was that this could be absolutely terrifying and, if nothing else, a good chance to appear a bumbling fool and weep abundant tears on television as I was made to chop an onion. Difficult, deciding whether or not to say yes.
But say yes I did, and I began the search for what recipe to make. I reasoned that it had to be something that a) traveled well b) wouldn't go rancid sitting under studio lights and c) would taste alright tepid since I'd have made it the day before. Many friends came up with excellent suggestions, but in the end I decided to make a lime pie with a ginger cookie crust from my Magnolia Bakery cookbook.

I had had it before, and wolfed the thing down in a matter of hours. It's midway between a cheesecake and custard, and the combination of the spicy/peppery ginger crust and the refreshing, citrusy lime is absolutely wonderful. It's also very easy to make (as long as your wrists hold out, juicing a dozen limes) and can be made into fun, individual-sized serving or into a large communal pie, depending on your preference.
And so on the appointed day, I showed up to work with my pie (packed in a cool bag to keep it fresh until the afternoon) so that I could take a half day off to go to the filming. I arrived at the studio, I introduced myself to the reception, and...nothing. For over an hour. When someone finally did come to speak to me, it was established that the production team had not only told me the wrong time to arrive, but they had also mixed up what day I would be there and had double booked me with someone else.
I was, to put it mildly, annoyed: to have gone through the time and effort of thinking about what to make, to have taken time off work, and to have been treated shoddily. But I have practiced my best zen breathing and have let it all go. I don't really mind not having had a brush with 15 seconds of cookery show semi-greatness, and the pie was still just as good as I remembered with people in the studio happily hoovering it up when I armed them with spoons and pushed them toward it. At least it saved me from eating the whole thing on my own this time.
Lime Pie with Gingersnap Crust, from the Magnolia Bakery Cookbook
- 1 1/2 C finely crushed ginger biscuits (approx 1 200 g package with 1-2 more ginger biscuits and 1-2 hobnobs crushed in, for good measure or for slightly larger-than-9 inch pie dishes)
- 1/4 C / 60 g butter, melted
- 1 C lime juice (approx 12 limes)
- 6 egg yolks
- 21 oz / 600 g sweetened condensed milk
- 1 Tbs freshly grated lime zest
- Pre-heat oven to 160 C / 325 F
- Combine well the melted butter and the crushed cookies
- Press the buttery crumbs into a 9-inch pie dish
- Bake the crust for 10 minutes and then allow to rest
- Combine the lime juice, egg yolks, and condensed milk, either using an electric mixer on low or mixing well by hand
- Stir in the lime zest, and taste for tartness; if too sweet, juice a few more lines and stir in
- Pour the lime mixture into the crust and bake 25-30 minutes until the middle is set
- Allow to cool for around 20 minutes, then refrigerate for at least 2 hours before serving
Monday, 29 October 2007
Daring Bakers Bostini Cream Pie: The Pride Cometh Before the Fall
This month's Daring Bakers Challenge was to make Bostini Cream Pie (chosen by Mary at Alpineberry), an orangey, chiffony twist on your regular Boston Cream Pie. It involved home-made custard heavily laden with cream, which we in the A&N home don't really eat since dairy like that doesn't make us feel our best. When we were invited to a friend's for Sunday lunch, and that same friend dared me (yes, dared me) to make the dessert for the day, the Bostini Cream Pie seemed the perfect thing to make - I could off-load some of that dairy onto others, and the existence of a baking dare seemed to flow with the spirit of what the Daring Bakers are about.
I was very proud of how I earned my orange zest: the day before making the cake, I had a fresh orange juice from a local cafe and in a flash of inspiration, asked for the rinds as a donation which they were more than happy to give me (the man next to me tried to then haggle some 'disused bacon' for his dog, but he was less successful). In shopping for the rest of the ingredients, Mr. A&N kept acting like a little devil on my shoulder, trying to discourage me from buying the milk and cream and making the custard as I ought to ('Just buy the powdered stuff - you can use soy milk and no one will ever know...'). I knew I could alter the recipe to go non-dairy if I could find a decent substitute, but I couldn't really find any and knew that powdered custard certainly didn't fall into that category. I stood firm, repeating the no-undue-changes-to-the-recipe rule of the group again (and again, and eventually just ignoring Mr. A&N) and finally reminded him that he wasn't obliged to eat the cake.
And so to the cake making. I decided to make one large pie rather than 8 smaller ramekins-full, mostly for ease of traveling but also because I wanted to actually see the layers resting on top of each other rather than have them hidden inside a small dish. I made the cake-part first since I would put the custard to cool in the same tin; I had it all perfectly timed so that I would be bringing the custard to the boil just as the cake came out of the oven.
I was very proud of myself, from the free orange rinds to the precision-timing to the tidy mis en place I set up. The peaking of the eggs for the chiffon went well, the folding the whites into the batter did too (although folding is always slightly curious to me, as if I'm tricking the batter into thinking I'm not over-mixing it. With each gentle turning over of the spatula, mentally whispering to it 'It's ok, see? I'm not really stirring. There - that was gentle, wasn't it?'). Mr. A&N came into the kitchen at this point to see how I was doing.
"It's pretty easy this month" I said. And then I did the worst possible thing I could do. I laughed in the face of this challenge.
I had become over-confident.
Arrogant.
Careless.
Civilizations have been doomed for smiting the gods in such a way, and like the great societies of old I was about to suffer my fall after all that pride.
The cake went in and around the 20 minute mark I began the custard. I took the cake out at 25 minutes as the recipe called for, and it had risen beautifully but didn't spring back under my fingers as it ought; it made more of a sighing noise. The top was browning, but I stuck it in for another 10 minutes. I finished the custard, and again took the cake out. Touching it produced still more sighing but also a gentle springing. I was worried about the top getting too brown so I decided it was probably done and let it sit on the side. A few minutes passed and as I went to take the tin away from the cake, I saw that it had fallen and that a crater had grown in the center, revealing a very raw interior.
And it finally made sense: the recipe had called for 8 smaller servings, baked for 25 minutes. I had made one large serving but didn't think of increasing the cooking time.
The cake went back in the oven which by now had been off for 10 minutes. It cooked for another 30 minutes until it really did spring back to the touch. Only now, it wasn't so risen. It was fairly flat, and dense looking. Prying a piece of outer skin off revealed it to be chewy rather than light. From triumph to tragedy in a few easy steps.
The custard tasted fine and I put it into the cake tin (cake now removed) to set. Before leaving for my friend's place, I removed the custard from the fridge and set the cake on top. At this point, I discovered the cake had shrunk event further, and that the spring-form cake tin hadn't been entirely even-bottomed when I put it together. The custard hadn't leaked, but it was clear that when the cream pie was placed on a plate, it would be tilting to the side in a Pisa-like fashion.
The list of woes was complete after arriving at my friend's (with sad pie in tow) and in preparing to make the chocolate sauce I discovered that the only butter they had in the house was salted. Cue slightly-salty chocolate sauce, poured on top of the leaning flattened tower of pie.
My Bostini Cream Pie could have been more of a disaster, but only just. True, everyone had a slice, and some of the men went back for seconds. But coming close to producing a good result helped me to see just how much better the pie could have been. I look forward to reading about all the other Daring Bakers and their successes, and living vicariously through their chatter about how delicious their pies were. Bostini and I clearly aren't meant to be close bed-fellows, but that shouldn't dissuade anyone else from trying it.
Bostini Cream Pie (from Donna Scala & Kurtis Baguley of Bistro Don Giovanni and Scala's Bistro)
(makes 8 generous servings)
Custard (Pastry Cream)
- 3/4 cup whole milk
- 2 3/4 tablespoons cornstarch
- 1 whole egg, beaten
- 9 egg yolks, beaten
- 3 3/4 cups heavy whipping cream
- 1/2 vanilla bean (or 1 tsp pure vanilla extract)
- 1/2 cup + 1 tablespoon sugar
- 1 1/2 cups cake flour
- 3/4 cup superfine sugar
- 1 1/3 teaspoons baking powder
- 1/3 teaspoon salt
- 1/3 cup canola/rapeseed oil
- 1/3 cup beaten egg yolks (3 to 4 yolks)
- 3/4 cup fresh orange juice
- 1 1/2 tablespoons grated orange zest
- 1 teaspoon pure vanilla extract
- 1 cup egg whites (about 8 large)
- 1 teaspoon cream of tartar
- 8 ounces semi or bittersweet chocolate
- 8 ounces unsalted butter
- Combine the milk and cornstarch in a bowl; blend until smooth.
- Whisk in the whole egg and yolks, beating until smooth.
- Combine the cream, vanilla bean and sugar in a saucepan and carefully bring to a boil.
- When the mixture just boils, whisk a ladleful into the egg mixture to temper it, then whisk this back into the cream mixture.
- Cook, stirring constantly, until the mixture is thick enough to coat the back of a spoon.
- Strain the custard and pour into 8 large custard cups. Refrigerate to chill.
- Preheat the oven to 325°F.
- Spray 8 molds with nonstick cooking spray. You may use 7-ounce custard cups, oven-proof wide mugs or even large foil cups. Whatever you use should be the same size as the custard cups.
- Sift the cake flour, sugar, baking powder and salt into a large bowl.
- Add the oil, egg yolks, orange juice, zest and vanilla.
- Stir until smooth, but do not overbeat.
- Beat the egg whites until frothy. Add the cream of tartar and beat until soft peaks form.
- Gently fold the beaten whites into the orange batter.
- Fill the sprayed molds nearly to the top with the batter.
- Bake approximately 25 minutes, until the cakes bounce back when lightly pressed with your fingertip. Do not overbake. (note: If you're making fewer than 8 molds, you will need to increase the cooking time. My one large Bostini took 50-60 minutes to bake)
- Remove from the oven and let cool on a wire rack.
- When completely cool, remove the cakes from the molds. Cover the cakes to keep them moist.
- Chop the chocolate into small pieces.
- Place the butter in a saucepan and heat until it is just about to bubble.
- Remove from the heat; add the chocolate and stir to melt.
- Pour through a strainer and keep warm.
- Cut a thin slice from the top of each cake to create a flat surface.
- Place a cake flat-side down on top of each custard.
- Cover the tops with warm chocolate glaze. Serve immediately.
Thursday, 4 October 2007
A Gift of Brownies
I'm not sure where this instinct in me originates from, but whenever I feel stuck for a little gift to give someone, I give food. For example, when I feel Mr. A&N deserves a bit of attention, I'll go off and buy him some nice sausages or a pork pie. If we're going around to a friend's for dinner, I'll bring homemade jam or some cake. I've lost all perspective on whether or not this is normal. Today's situation is that an environmentally-conscious pregnant friend is about to have a special event; flowers are out, booze is out, but brownies, I've determined, are very, very in.
Brownies are my go-to baked product. During my time as a graduate student several years back, I would spend evenings in the pub (over the year, I studiously worked my way up to 4 pints a night without being completely annihilated), skipping food since that was too pricey, and then stumble my way home, whip up a batch of brownies, and eat half the pan before drunkenly falling into bed. I'm still sometimes amazed my body survived that year of nutritional deprivation. I've tweaked the brownie recipe slightly over the years, but the basic recipe has stayed the same due to their slightly-crispy-crust-with-slightly-gooey insides that many other brownies just fail to deliver on and which I can't get enough of. So in my book of ideas that might-or-might-not be normal, they're an excellent special-event-run-by-a-pregnant-friend gift.
Brownies
Fits comfortably in an 8x8in baking tin, or equivalent
- 1/2 C / 110 g unsalted butter
- 1 C granulated sugar
- 2 eggs
- 1 tsp vanilla extract
- 1 shot of espresso or 1 spoonful of instant coffee, dissolved in a bit of hot water
- 1/2 C cake flour
- 1/3 C + 1 Tbs cocoa powder
- 1 1/2 tsp cinnamon
- 1/2 tsp baking powder
- 1/2 tsp salt
- Pre-heat oven to 175 C.
- Melt the butter in a saucepan over a medium low heat, taking care not to sizzle it.
- When melted, turn off heat and let sit for a minute or so to cool. Stir in the sugar.
- Add both eggs, vanilla extract, and coffee, and stir well.
- Sift together the dry ingredients, and add to the wet ingredients.
- Grease and flour the baking pan, and pour the brownie batter into it.
- Cook in the middle of the oven for 20-25 minutes, or until a skewer emerges mostly clean (there will be a bit of goo on it since these are slightly fudgey brownies).
- Allow to cool in the pan for a ouple of minutes, then cool on a cooling rack.
Sunday, 30 September 2007
Daring Bakers Cinnamon Buns
It was with great pleasure that, at the end of last month, I became a Daring Baker (note the capital letters). I had been reading about their baking exploits on various blogs for a while, and I finally got my act together and figured out how to join them. The recipe set for my inaugural exploit was buns - your choice as to whether to make them of the cinnamon or the sticky variety, as chosen by Marce at Pip in the City. Cinnamon buns have always been a weakness of mine (I confess, especially the Pilsbury ones), and since I'm not a person to resist my temptations, cinnamon buns it would be.
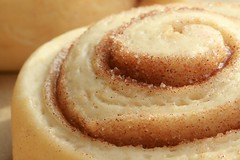
I followed the instructions very much to their letter; I didn't want my first Daring Baking experience to be a wash-out, and the rising of the dough had me vaguely nervous since yeast doesn't always comply with my wishes. Following the initial mixing of ingredients, the instructions called for either a mixer to knead the dough, or 15 minutes of strenuous hand-kneading. As I sadly don't have a mixer, I had a quarter of an hour of hard graft. And I learned that although 15 minutes of kneading by hand *sounds* like a long time, 15 minutes of kneading by hand is, in fact, a horribly, strenuously, wrist-numbingly long time. I did my best to practice my Alexander Technique breathing and posture along the way, but I was watching those seconds on the timer tick down like a desperate woman waiting to be released from prison.
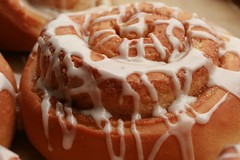
I took the promising-looking rising of the dough as a sign that a) I was doing well with the recipe and b) I could take a break while the dough did some work. To off-set some of the calories to come, I used the 2 hour rising period as a time for Mr A&N and me to take a Sunday stroll. However, when he began getting ideas about stopping in the local pub and having a nice pint of bitter (and inevitably whiling away the rest of the day there) the cinnamon buns suddenly mysteriously began urgently calling us home to tend to them. Curious.
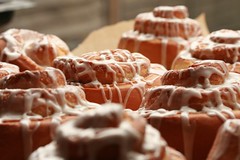
The rest of the bun making went very well, and the buns did come out looking like proper, store-bought creatures. I do think I erred at one point, however, and I would minorly adjust the recipe in one place if I were to do it again. First for the error: when rolling out the dough, I labored a bit to make the rectangle nice and perfect and evenly rectangular. After creating my rectangle I read on further, and saw a warning not to overwork the dough during rolling otherwise the buns might turn out tough rather than soft. Well, that was my punishment, because the buns were slightly on the tough side. The adjustment I would make to the recipe would be to increase again by half the amount of cinnamon sugar called for. I do have quite a taste for cinnamon so that may be influencing my thoughts, but I also found that the lemon flavoring in the dough battled with the cinnamon for pride-of-place - and these are called 'cinnamon buns', after all.
My first daring baker challenge is done, and I really enjoyed doing it, as well as eating (and sharing...grudgingly) the results. Roll on more daring baking.

Cinnamon Buns, from Peter Reinhart's The Bread Baker's Apprentice
Makes about 1 dozen large buns
- 6 1/2 Tbs / 3.25 oz caster or granulated sugar
- 1 tsp salt
- 5 1/2 Tbs / 2.75 oz shotening, unsalted butter, or margerine
- 1 L egg, lightly beaten
- 1 tsp lemon extract or 1 tsp grates lemon zest
- 3 1/2 C / 16 oz white flour
- 2 tsp instant yeast
- 1 1/8 - 1/1/4 C whole milk or buttermilk, room temperature
- 1/2 C cinnamon sugar (6 1/2 Tbs sugar mixed with 1 1/2 tsp cinnamon)
- White fondant glaze:
- 1 C powdered sugar
- 1/4 tsp lemon, orange, or vanilla extract
- 1 1/2 Tbs - 1/8 C warm milk
- Cream together sugar, salt, and shortening/butter, either using a blender with paddle attachment on medium-high, or by hand.
- Whip in egg and lemon until smooth.
- Add flour, yeast, and milk, and mix on low/stir by hand until mixture forms a ball.
- If using a blender, switch to the dough hook and mix on medium for 10 minutes, or knead by hand for 12-15 minutes. Dough should be 'silky and supple, tacky but not sticky'. Even texture out with flour or water, as needed.
- Lightly coat a large bowl with oil, and place dough ball in the bowl, rolling around so it's lightly coated.
- Cover the bowl with plastic wrap and allow to rise at room temperature for about 2 hours or until double in size.
- Clean and prepare a counter top for rolling out the buns. Lightly mist with oil so the dough will not stick.
- With a rolling pin, roll out the dough so it forms a large rectangle, about 12 in x 14 in, and is about 2/3 inch thick. Don't over-roll or make the dough too thin, or the buns will be slightly tough.
- Evenly sprinkle the cinnamon sugar over the rectangle.
- Roll up the dough moderately tightly, forming a cinnamon-sugar spiral.
- Cut the dough into about 1 3/4 in thick slices for large buns.
- Turn the buns on their side, so the cinnamon spiral is facing upward, and spread out on a baking tray that is already covered in cooking paper. Buns should have about 1/2 in inbetween each other.
- Allow to proof at roof temperature for about 1 1-1/2 hours, until they have nearly doubled and are almost touching.
- Pre-heat oven to 175 C / 350 F, with the wire rack in the middle of the oven.
- Bake for about 20-30 minutes or until golden brown.
- Cool the buns for about 10 minutes, and then streak with the fondant glaze. (For fondant glaze: mix the sugar, extract, and minimum amount of milk together, adding more milk to make the glaze thick but able to drizzle easily).
- Place buns on a cooling rack, and allow to cool another 20 minutes before serving (if you can resist).
Wednesday, 29 August 2007
St John Bread (Wine, I Can't Speak of)
I've said it before, but I work in a very good London spot for food indulgences, and my pay check thoroughly supports the local community. At the triangle between Farringdon, Islington, and Exmouth Market, there are some superb gastronomic experiences to be had. One of them is at St. John Bread and Wine, just a few minutes walk from my office.
I have eaten at the restaurant before and agreed with Anthony Bourdain that the roasted marrow was amazing (though Anthony took it a bit further, going into rapture over them and maybe even hearing angels singing as he took his first bite). St John Bread and Wine also does what it says on the tin: it's a functioning wine bar and bakery, and there are some wonderful loaves of bread on sale if you care to pop in and buy one. I care, and so I bought.
We try to be healthy, Mr. A&N and I, so we normally opt for wholewheat bread, but the white on offer at St. John was the crusty fragrant stuff you normally associate with stolen moments in front of a Parisian bakery window watching the natives queue for the bakery's best bread. White it would be, on this occasion. The loaf was pretty big - a good foot-and-a-something long and fat, almost like a newborn baby, if a newborn were to be sculpted from bread - so £3 felt a fair price for it. It was a sign of my will power and maturity that I didn't tear into the bread until after I got home (pats on the back for me). The bread reminded me a lot in flavor and texture to the 24-hour loaf of bread I baked last month, which I loved at the time. I thought it was only appropriate to eat the bread with some of my more posh spreads; pate, homemade rhubarb and apple jam, and nice olive oil. It tasted pretty good with bacon inside it too, and even just on its own, it must be said. I just can't believe it's taken me over a year of working in the area to think of stopping in to St. John for my bread, but it is well, well worth the trip.
Monday, 27 August 2007
Peyton and Byrne Cupcakes
After reading about them in Eat Like A Girl, the spectre of Peyton and Burne cupcakes loomed large in my mind (a giant ghostly cupcake, one of your more pleasant poltergeists) and I knew I would have to submit and buy some. With a visit to my new godson, Matthew (as well as to mother Deirdre and sister Roisin) as an excuse, I made a special trip to their shop on Tottenham Court Road in order to chose my selection.
The shop was very sweet looking and instilled 1950's cupcake-confidence - I even felt myself taking mental notes on their tiles and grouting for my new kitchen (grouting! exciting! I've entered a parallel world, I think). At £10 for 5 cupcakes you have to be committed to the cause, which indeed I was. And off I went, hoping I wouldn't look too greedy when I presented my 'gift' of cupcakes and immediatly ate 20% of the overall bounty.
Roisin, as you can see, was very taken by the yellow iced cupcake (of the few pictures I tried to take, her pointing finger - 'Want this one' - or hovering hand was in each. I think it adds character to the shot. You just have to accept when around a toddler that if they want a piece of what you're doing, you won't get any peace in what you're doing). And why wouldn't she set eyes on that mini cake - it is quite alluring. When wrapper was peeled back, the cupcake itself looked yellowy and fluffy moist, just as you'd hope it would. Deirdre and I shared the mint chocolate cupcake, and I found that not as exciting as I had hoped. The cupcake was a bit dense rather than fluffy, and the icing didn't taste as minty as I would have liked nor the cake as chocolatey. Perhaps the yellow-caked ones are a better bet, but for £2 a cupcake you'd hope they'd all be quite spectacular. Funnily enough, Su-Lin at Tamarind and Thyme had a cupcake experience last weekend as well , and she favors the treats found at the Hummingbird Bakery (also recommended by Amanda the American, friend of Ambrosia and Nectar and frequent co-eater). Out of fairness, I will have to make a trip to compare them.
For good measure, I've thrown in a picture of the guest of honor (and secondary cupcake recipient) Matthew, all of 16 days old in this shot. As a good godmother, I promise to make him all the baked goods he wants when he grows up (he even has it in writing, now).
Monday, 13 August 2007
Oatmeal Raisin Almond Cookies
My oft-mentioned pregnant friend is no longer pregnant - meaning there's a new baby to welcome in to this world. We had been due to meet baby Matthew and congratulate his parents this weekend, and rather than buy the predictable bunch of flowers for them, I opted to bake (any excuse). Besides, the mother needs to eat in order to keep the baby fed, so it was easy to justify this as the appropriate baby-warming gesture.
In the end, mother and father were a bit too tired to host well-wishers, so we were left with a few dozen cookies, a pint of (soya) milk, and only our wits to help us to figure out what to do next.
Oatmeal Raisin Almond Cookies
From the Magnolia Bakery Cookbook
- 2 1/4 C flour
- 3/4 tsp bakinig soda
- 1/2 tsp salt
- 1 C / 220 g butter
- 1 1/2 C firmly packed light brown sugar
- 2 large eggs
- 1 Tbs vanilla extract
- 1/2 tsp almond extract
- 1 1/4 C rolled oats
- 1 1/2 C raisins
- 1/2 finely chopped toasted almonds (almonds baked at 160 C for 10-15 minutes)
- Pre-heat oven to 175 C
- Sift together the flour, baking soda and salt. Put aside.
- Cream together the butter and sugar using a mixer - mix for about 3 minutes.
- Add the eggs, vanilla and almond extracts, and mix well.
- Add the flour mixture in batches, beating until well combined.
- Add in the oats, again beating well, and then add the raisins.
- Chill the mixture for around 30 minutes.
- When chilled, drop by rounded teaspoon-full onto an un-greased cookie sheet, leaving enough room for the cookies to spread.
- Bake for 15-18 minutes or until golden. Allow to sit on the cookie sheet for a minute before moving onto a cooling rack.


